Your garden, from first plan to next season
Start with one bed and a few plants. Give them room, decide when they will occupy the bed, and keep a record of what happens. You can return to the same plan as the season unfolds.
This guide shows real sections of veggie.farm, using a sample kitchen garden. The dates, arrangement and harvest record are examples for learning the interface, not growing recommendations. Screenshots show the desktop layout; on a phone, the tool rail sits at the bottom and panels open over the canvas.
Open Studio · Find plants · Garden Today
Choose your starting point
| What you want to do | Start here |
|---|---|
| Make your first plan | Start with a bed |
| Choose and arrange plants | Give each plant space |
| See the garden from another angle | Explore in 3D |
| Plan successive crops | Plan through the season |
| Record a harvest or observation | Keep the garden's history |
| Keep a copy or move to another device | Save and back up |
| Use imagery, trees or shade estimates | Find the advanced tools |
Start with a bed
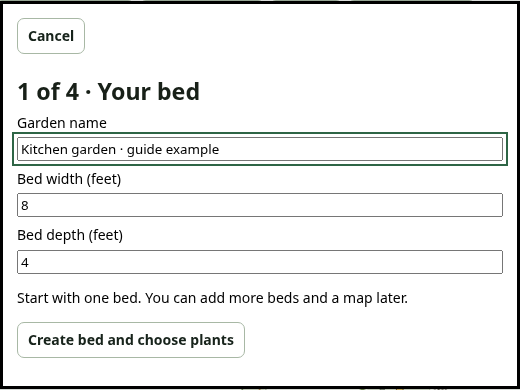
In Studio, choose Start with a 4 × 8 bed. Give the garden a name and adjust the width and depth to your available space. Choose Create bed and choose plants to continue. You can begin without a map or an account.
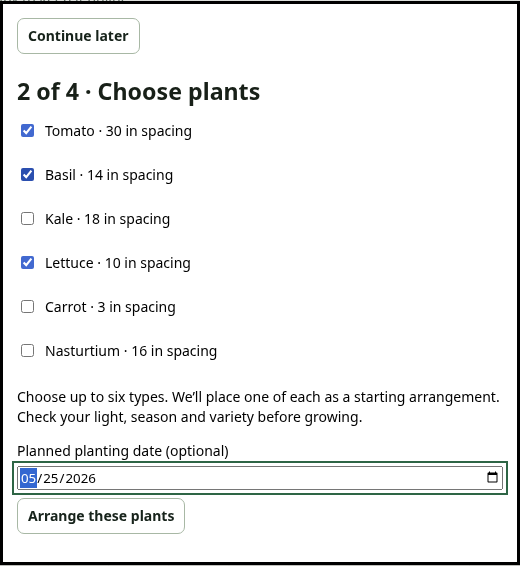
Choose a few crops you want to grow. The starter places one of each selected type as an arrangement to review. An optional planting date describes your plan; it does not record an actual sowing or transplanting event.
For a wider choice, use Find Plants on the main site. Search for a crop or variety, compare its recorded facts, then use Add to plan. Studio's planning tray holds that choice while you decide where it belongs. In Studio's plant library, switch between Plants in this garden and All plants when you want to explore beyond your existing choices.
Give each plant space
Select a plant to open its inspector. Inspecting is safe: moving a plant requires an explicit Edit plants action. Drag plants in the bed once editing is enabled, and review the spacing warnings. Return to Pan or lock editing before exploring again.
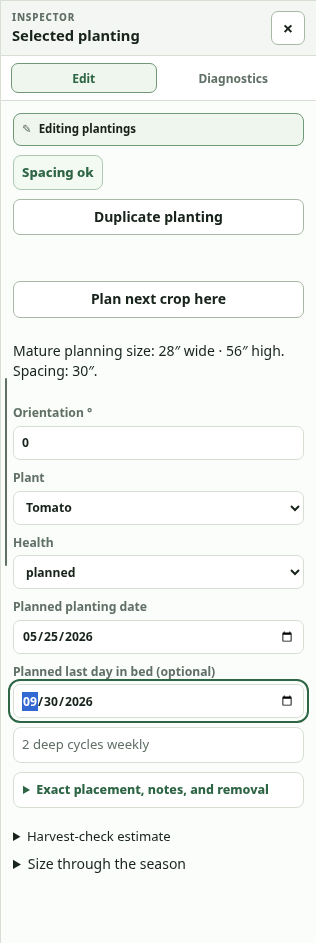
The inspector is where you choose the plant, enter planned dates and adjust orientation. Duplicate planting makes a separate planned plant when there is room; it does not copy the original's observation history.
Use 2D to read the layout from above and 3D to understand height and volume. The spacing footprint helps you leave room for mature plants. A model is an illustration of recorded or estimated dimensions, not a promise of growth or yield.
Explore in 3D
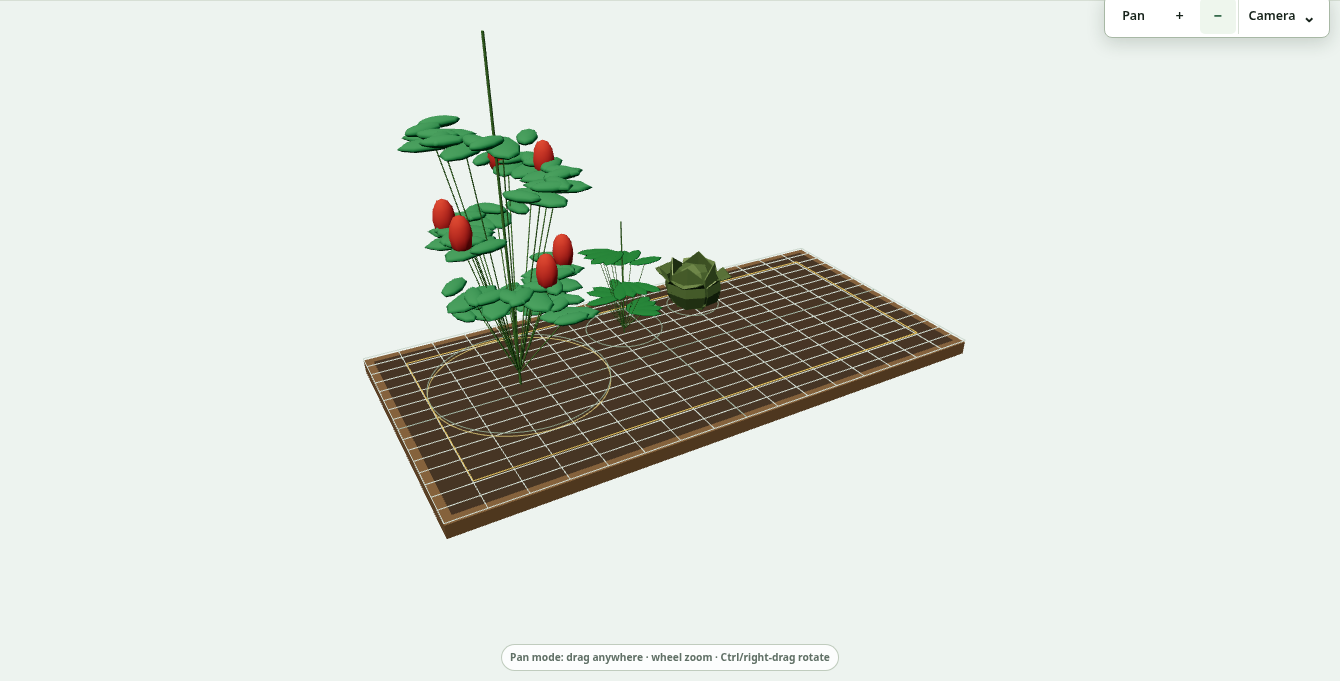
Choose 3D above the canvas. Use Pan, + / −, and Camera to change your view. The 3D plant library is available beside the workspace controls when you want to inspect the available models.
For a larger garden, choose Explore garden, then Walk through. Use the visible walking arrows to move; drag to look around. On a keyboard, W/S step forward and backward, A/D turn, and Escape leaves the walking view.
Select a bed and use Plan this bed → in its inspector, or Plan selected bed above the canvas, to return to detailed planting. Back to walk returns to the walking context when you entered the bed from that view. Public example gardens are incomplete reconstructions with illustrative plantings; use them to explore the workflow.
Plan through the season
The Season in… panel beneath the canvas combines a year, month buttons, an exact date and a day slider. Turning on Date preview, or selecting a month, shows the plants whose planned occupancy includes that date. The schedule underneath keeps the dates visible together.
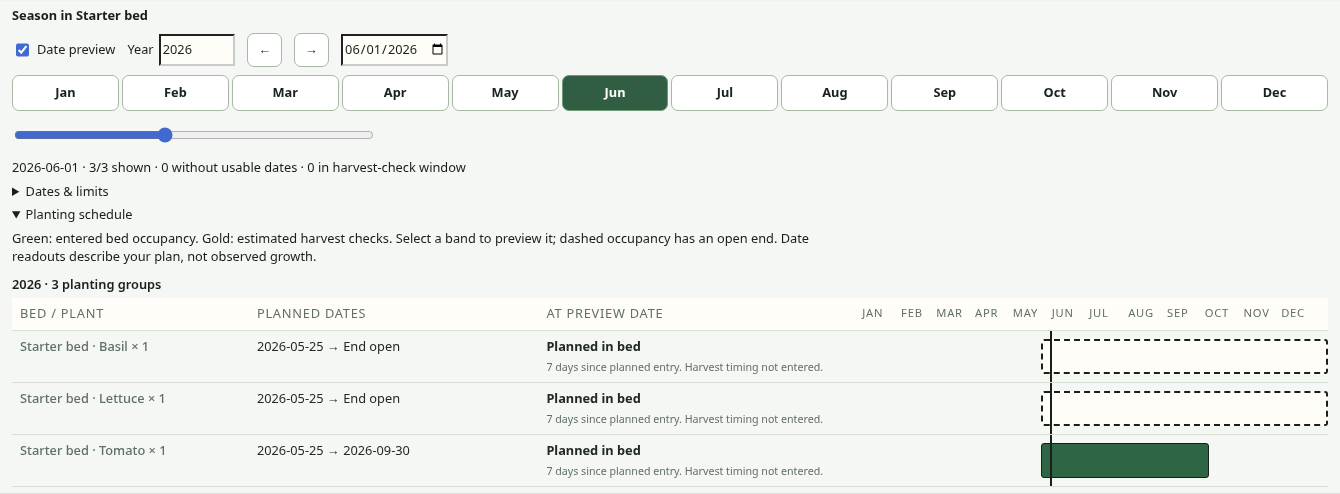
To reuse a space, enter the first crop's Planned last day in bed, then choose Plan next crop here in its inspector. Select the next crop and a start date after that last day. Studio keeps both plantings as separate records and checks their overlapping dates when considering spacing.
An undated planting remains visible. An empty end date stays open-ended. Date preview shows your planned occupancy; it does not automatically predict plant growth or harvest readiness. Record what actually happens separately.
Keep the garden's history
Open My garden · Log in Studio. Choose the planting, what happened and the date. A short observation can be enough. For Harvested, you can also enter a quantity, unit and quality.
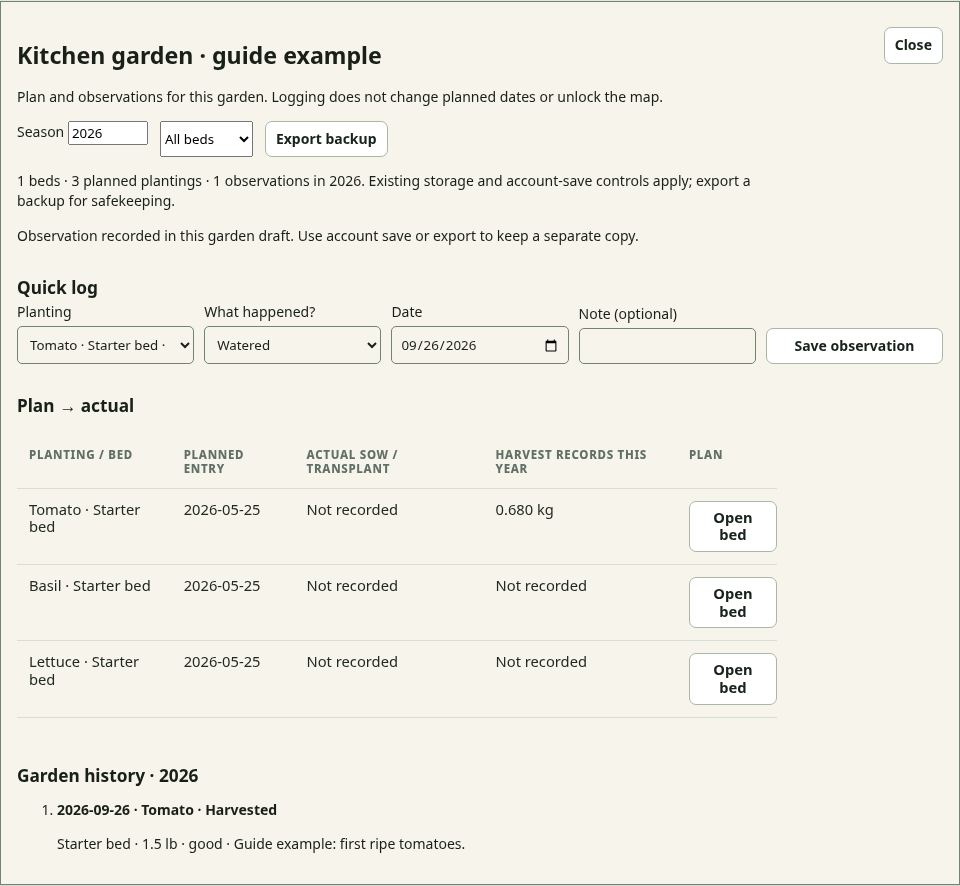
Logging an observation does not change the planned dates. That distinction lets you compare your intentions with what happened. Use the bed and season filters when the history becomes longer.
The main site's Garden Notebook also accepts broader field notes, soil information and garden context. For an observation about a particular Studio plant, starting from My garden · Log keeps that planting attached to the record. The two domains have separate browser storage; do not assume a local draft automatically follows you between them or between devices. Use the explicit account-save and load controls or a backup when moving a plan.
Save and back up
Finish the starter with Ready to save, name the plan, and choose Save named plan. Later, use Save above the canvas to keep a named version. The project menu (…) contains saved versions and Backup and restore.
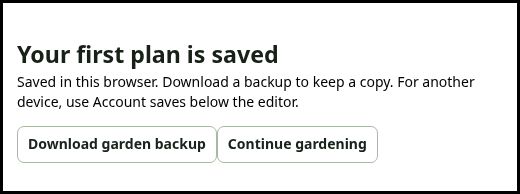
Download the planner JSON before clearing browser data or changing devices. Use Restore full planner JSON… to bring a backup into Studio. Account saves are explicit: sign in, save the garden copy, and load the intended copy on the other device. Check the save status before leaving.
Find the advanced tools
Leave Tools set to Simple for everyday bed planning. Choose Advanced for parcel imagery, site features, established trees, map layers, terrain, soil context and GIS exchange. Existing structures and trees remain in the scene in either mode. Switching modes closes the panels and ends active editing.
For sunlight, choose Advanced and enable Sun & shade. Use its date and time controls to compare the scene and inspect the estimated light on beds. Results depend on the supplied location, obstruction shapes and heights. They are planning estimates, not measured sun hours. Compare them with observations in your own garden.
Come back with a question
Use Garden Today to check timing against the conditions you have entered. Read a growing guide, adjust the plan, go outside, and record what you notice. At the end of a season, review the history before deciding what to repeat or change.
Open your garden plan · Open Garden Notebook · Read the story behind veggie.farm
Screenshots: veggie.farm, September 2026, synthetic browser-local example. Interface labels may evolve as the application improves.